Use Case: Welcome Email
In previous post, we discussed about customer onboarding process and try to emphasise how important to your business. Now let’s see how you can implement a successful on boarding process with Herogi.
Scenarios
Scenarios are fundamental part of Herogi. Basically a scenario group of states which are connected to each other with events. You can find more about it in our user guide.
We want to have two different scenarios triggered by same event (register) but they’re serving for different purposes. First scenario will send a welcome email to customer, second one will register customer on our CRM tool, Hubspot as potential lead.
Let’s start with the simple one, welcome scenario.
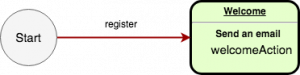
1. Welcome Scenario
As we mentioned before, with this scenario we want to send a warm welcome email to every customer registered. It’s simple scenario with single state includes an action to send an email. Here you can see the visualisation of this scenario.
Now we need to create our register event and welcomeAction to send email when customers go into welcome state.
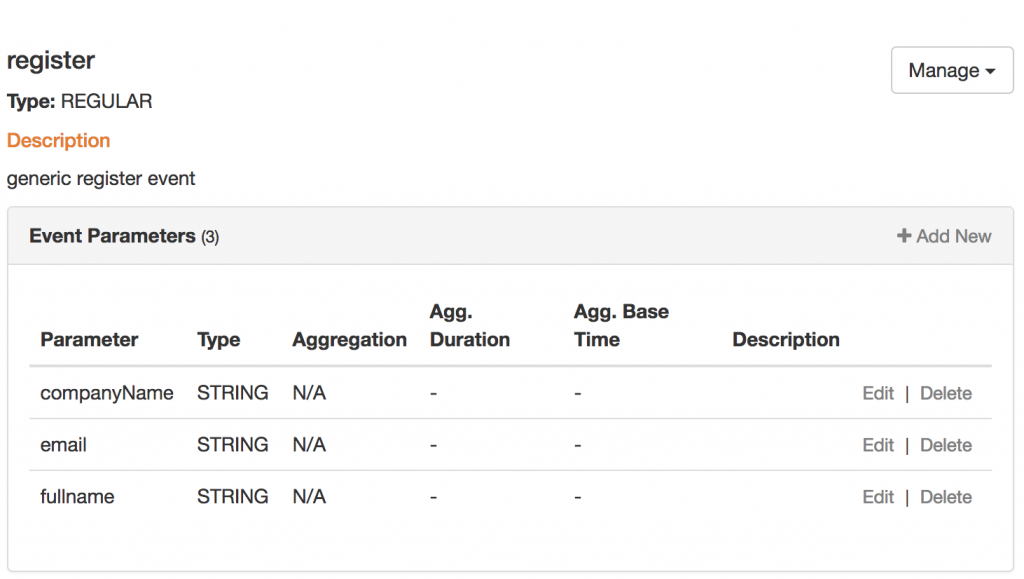
Event
Register email consist of 3 fields, you can enrich it with other parameters which it may help you to create more customised actions. In our case because our register flow simple we don’t collect much data so email, company name and contact name is enough. Here how the event represented in our dashboard;
Action
Welcome action, this is a basic smtp action which Herogi supports as built-in. You can find support for different service providers like Aws, Sendgrid, Mailjet in Herogi. Herogi use Aws for our email scenarios because it’s cheap and easy to scale.
Here how the action represented in our dashboard;
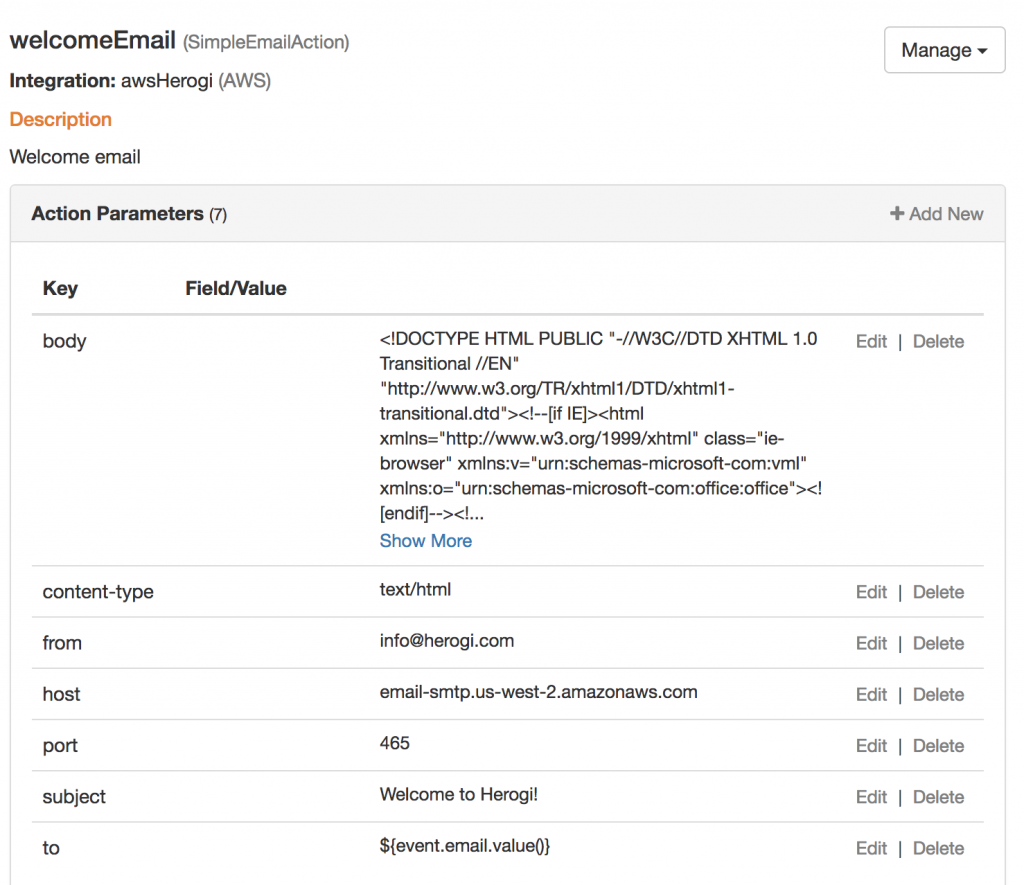
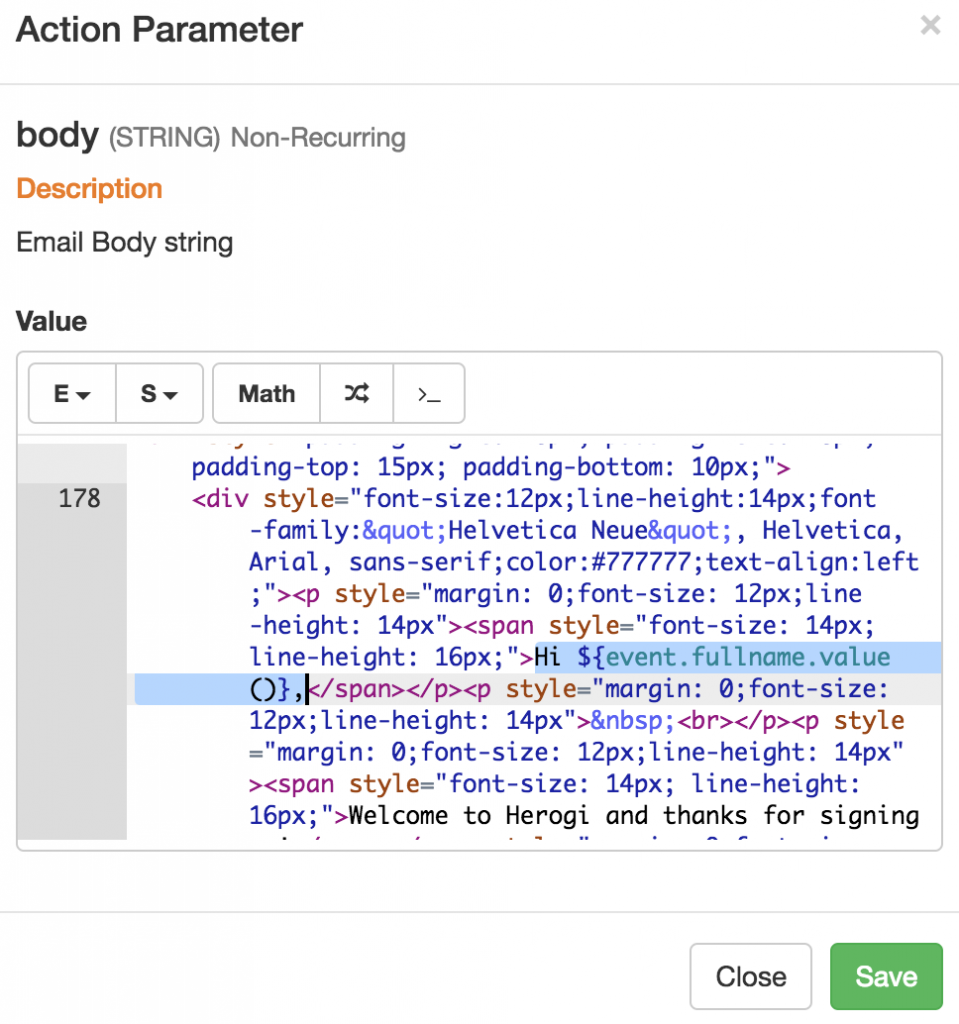
As you can see you have everything necessary to send an email. You can customize subject, from, to and of course body. You can use parameters defined in the event in your action parameters.
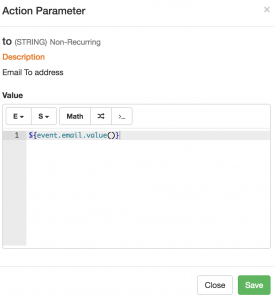
First of all we want to send to customer’s email address so that’s why we use; ${event.email.value()}, it means, use email address from register event. Our subject is static text as “Welcome to Herogi!” but our email body is a little bit customized as you can see, we use customer’s full name from event to greet her, see the highlighted text from screenshot.
We use Bee to design our html for email, it’s a great online service to generate html, you can check it here. Once you have your html you can just paste it in body section of action and provide dynamic functionality by scripting with event parameters.
Rest of the action parameters are just static configurations what make Aws email service works.
As you see everything in action customizable with event parameters. We use event parameters for mostly string substitution in this case but our scripting engine is a lot richer then this. You can write if/else expressions, iterations on list and etc. You can learn more about it here.
Scenario Design – State & Transition
Now our event and action is ready to use in scenario, now we should design our scenario. As we mentioned before it’s a single state scenario, it means every register events go into welcome state. You can see the example design from our dashboard;

Alright our scenario is completed, now only thing you need to do deploy it and feed it with register events.
Sending Event
This is the only integration you need to do live this scenario. Herogi provides simple rest api to send event or you can use our client libraries. Sample request for this scenario;
POST https://stream.herogi.com/event
{
   "sessionId":"demo",
   "scenarioNames": ["EngagementScenario"],
   "eventName":"register",
   "data" : {"email" : "demo@herogi.com","companyName" : "Test Ltd","fullname" : "Demo User"}
}
Result
We quickly discussed about welcome scenario, you probably wondering about the email itself, here it’s;

You can also monitor your scenario and see how it’s performing in the dashboards. It’ll give you better insight about engagement metrics than other analytics tools. Last you can change your email design at any time or you can run A/B test for your emails or you can provide further states to send re-engagement emails after a time period. To apply new changes, you just need to redeploy, which is one click operation 🙂
By the way if you register Herogi now, you’ll get this email from welcome scenario 🙂
I was initially planning to discuss CRM scenario in the same post but it’s way more complex than welcome scenario. I believe it’ll be better to have separate post for it.
Meanwhile you can explore Herogi here and build smarter automations for your business free.